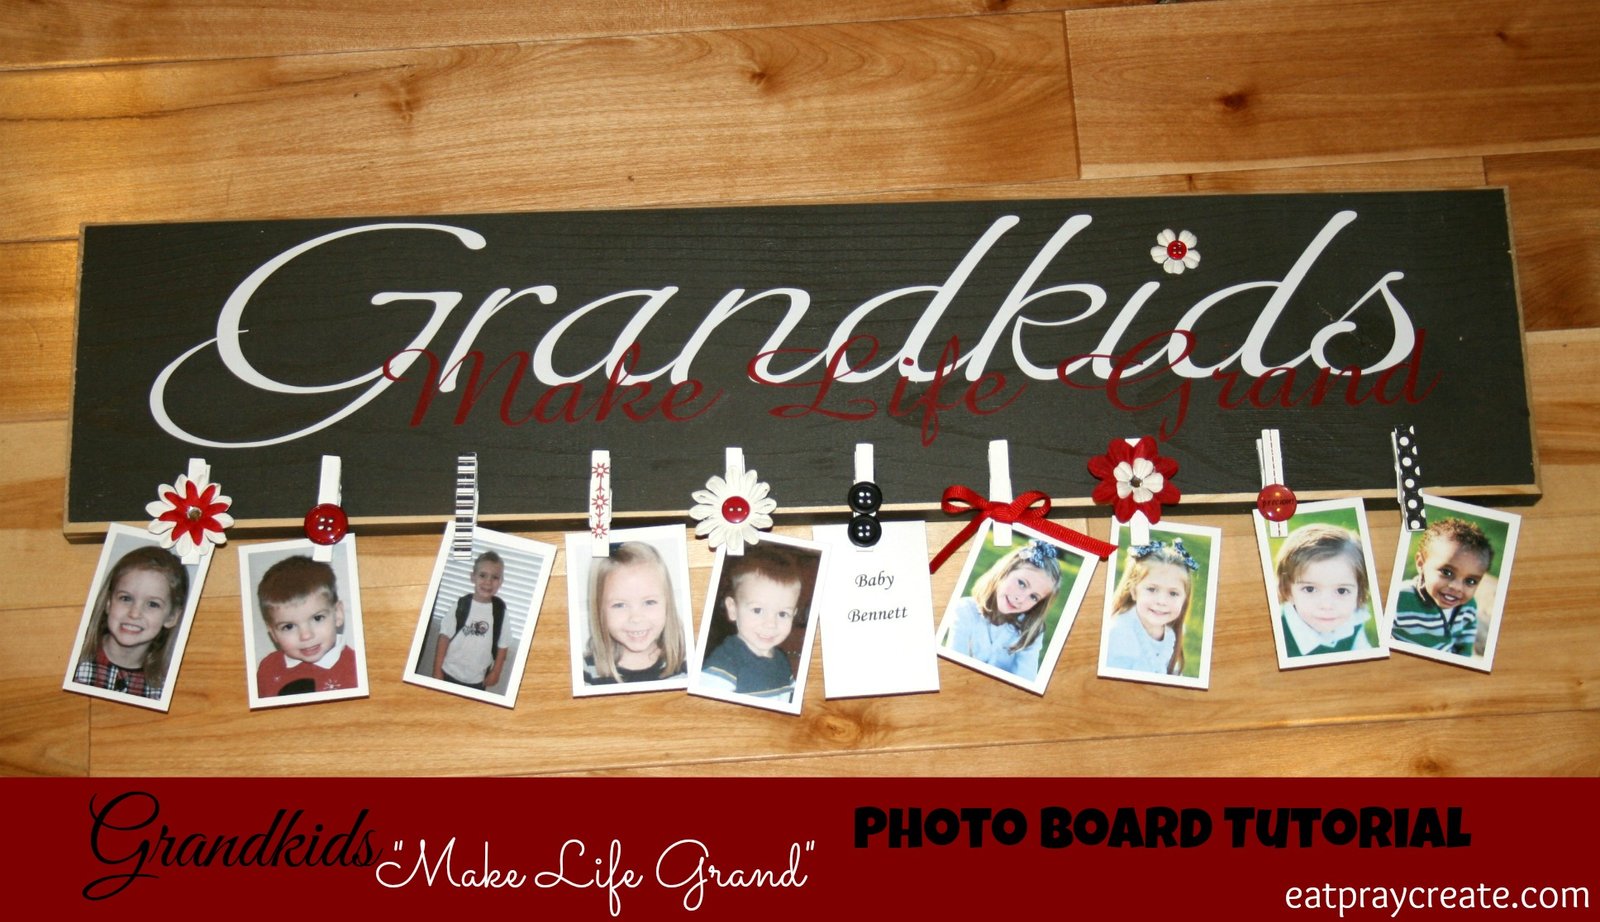
Grandkids Make Life Grand Picture Board Tutorial
Looking for a great gift for Grandma and Grandpa? Well look no further, I came up with this little Grandparent’s picture board several years ago and put it on my blog. It gets pinned like crazy! So I thought I would give you all a little step-by-step tutorial on how to make one, they are so easy and fun. The perfect personalized gift for Grandparents.

(This post contains Affiliate Links)
Supplies Needed:
- Wood Board – (mine is about 2 feet long)
- Paint/paint brush – (I used black for the board and white for the clothespins)
- Vinyl/Craft cutter – (I used white and red vinyl and my Silhouette Digital Craft Cutter- see note below for more info.)
- Mini clothespins – (you can find these at your local craft store, I found them at JoAnns, they also come pre-painted)
- Embellishments – (mini flowers, scrapbook paper, ribbon, buttons, gems)
- Hot glue gun/sticks or E6000 glue
- Sandpaper (optional)
**Note: Vinyl is an adhesive backed Craft Vinyl that comes in sheets or rolls and is used in home decorating and crafts. I buy mine from amazon or ebay in all different colors. A Digital Craft cutter is used to cut your vinyl (and other things like paper, cardstock, fabric, etc.) I love the silhouette because you can use your own images and fonts without having to purchase additional cartridges.
Tutorial:
- First Paint your board black (or desired color). -May take 2 coats. Paint the clothespins white.
- Once dry, sand the edges of the board if you like that kind of look.
- Cut your Vinyl out on your digital craft cutter. If you don’t have one you can easily hand paint the wording on your board using a smaller paint brush and paint. (I used the font ‘Marnie Regular’ for Grandkids and the font ‘Amaze’ for make life grand.)
- Apply your vinyl to your dried board. (Go HERE where I show you how to transfer vinyl)
- Next, I attached the clothespins using hot glue. The part that opens up should be facing down.
- Embellish the clothespins how you like using hot glue.
- Last but not least, add pictures! I just cropped and printed photos using Microsoft word and printed on cardstock. You could also print pictures and cut them to your desired size.


Latest posts by Taya (see all)
- Invisible Person Costume Tutorial - September 16, 2025
- Birth Stats Stuffed Animal Tutorial - September 24, 2024
- Star Tip Character Cakes Made Easy - January 20, 2023
Taya
Hi I'm Taya! A stay-at-home mother to 5 cuties. I love to craft, sew, blog and make fun things. I'm the creator of the 'Eat-Pray-Create' blog and I'm so glad you're here!


3 Comments
Tiffany | A Touch of Grace
Oh I love this idea as a grandparents’ gift! My in-laws would love this! So many different things you can do with it.
Thanks for sharing on the Shine Blog Hop!
Trish @ tagsthoughts.com
I adore this idea. My inlaws would absolutely love it!! It’s a must do. Thank you for sharing with the Creative Inspiration Link Party. Join us again next week, M 8p CST – W 8p CST.
Nanieo
Thank you for the instructions and providing the font names. Awesome. This will be a christmas gift for a friend and one for me !