
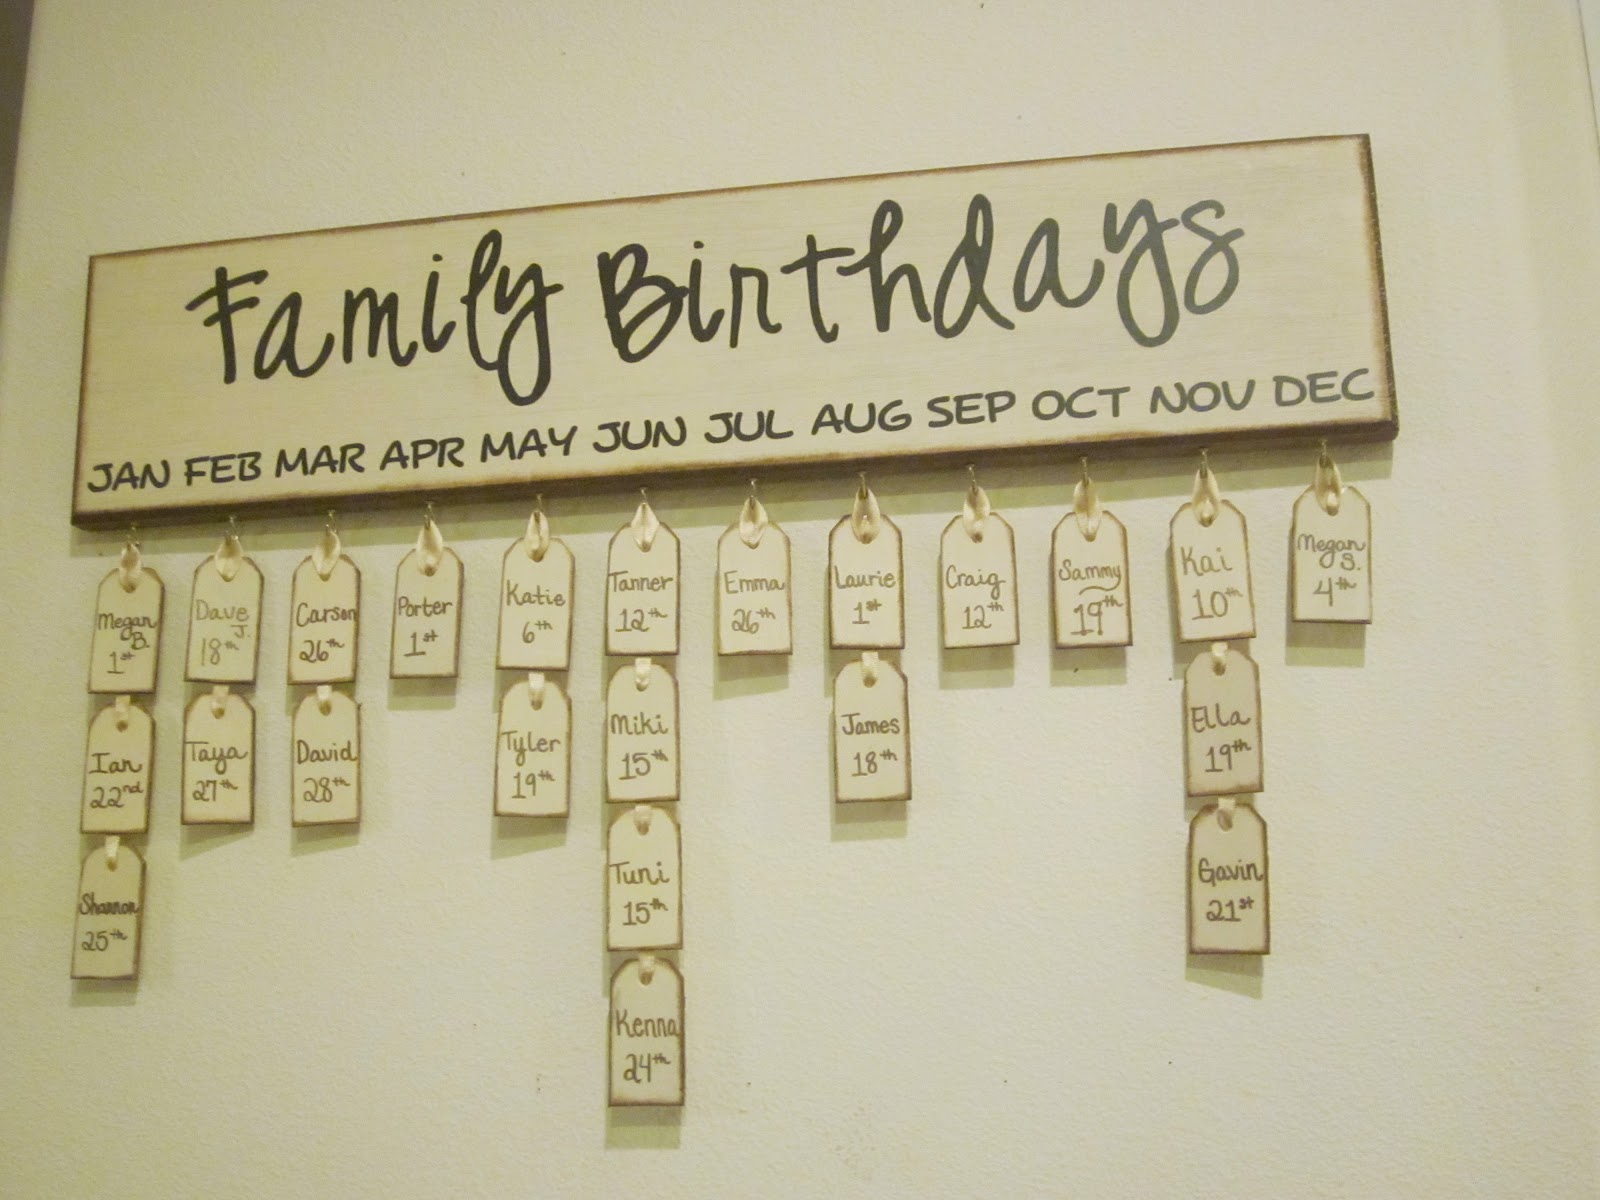
Birthday Board
(This post contains Affiliate Links)
Here are the only pics I took of the process (sorry there’s only 2!) Just paint a board the color you like, I then painted the egdes a darker brown. Cut your vinyl and line it all up. Attach vinyl, screw in some little hooks. Buy some little tags (I got these in packs at Joann’s for very cheap) I painted them to match the top(paint extra for when the family has new additions). I wrote the names and date on each tag with a paint pen (also from Joanns) then I cut gold pieces of ribbon to attach each one together, the top one is in a loop to hang on the hooks. I just hot glued the ribbon to the back of the wood tags. Turned out so cute!! You can order vinyl online or even paint the wording if you don’t have a vinyl cutter. UPDATE: The size of this board is 24 inches x 5-1/2 inches!
**This post has gotten really popular and lots of comments and questions so I decided to make a more detailed tutorial….see below!
Supplies Needed:
- Wood Board – (mine was 24 inches x 5-1/2 inches)
- Paint/paint brush – (I used cream and brown)
- Vinyl/Craft cutter – (I used black vinyl and my Silhouette Digital Craft Cutter- see note below for more info.)
- Wood tags – (you can find these at your local craft store in the wood section, I found them at JoAnns)
- Metal Hooks – (found at the hardware store)
- Ribbon – (I used a thin gold ribbon from the craft store)
- Paint Pen – (Found at your local craft store, got my dark brown one from JoAnns)
- Hot glue gun/sticks
**Note: Vinyl is an adhesive backed Craft Vinyl that comes in sheets or rolls and is used in home decorating and crafts. I buy mine from amazon or ebay in lots and different colors. A Digital Craft cutter is used to cut your vinyl (and other things like paper, cardstock, fabric, etc.) I love the silhouette because you can use your own images and fonts without having to purchase additional cartridges. I’ve also linked to wooden tags you may consider using – see examples below…
Tutorial:
- First Paint your board and tags cream (or desired color). -May take 2 coats.
- Once dry paint the edges the dark brown color, going over the top edges just slightly to get that rustic effect. I just lightly brushed over the edges of each of the tags.
- Cut your Vinyl out on your digital craft cutter. If you don’t have one you can easily hand paint the wording on your board using a smaller paint brush and paint. (The font I used for the ‘Family Birthdays’ part is ‘Digs My Hart’ and the months are ‘comic sans ms’)
- Apply your vinyl to your dried board. (Go HERE where I show you how to transfer vinyl)


- Next, I used a push pin to create a tiny hole below each month on the bottom of the board. Then hand screwed in all the hooks. If that is to difficult for you, you may have to pre-drill the holes using a drill.
- Finally I added all the names and birthdays to the tags using a paint pen, simply write the person’s name and date of birthday.
- Last but not least, I cut little pieces of gold ribbon and attached a loop to the top tags for each month using a hot glue gun. Attach each additional birthday using a strip of ribbon and hot glue. (If you end up adding birthdays later simply cut the ribbon and attach a new piece to include the new birthday)


Latest posts by Taya (see all)
- Invisible Person Costume Tutorial - September 16, 2025
- Birth Stats Stuffed Animal Tutorial - September 24, 2024
- Star Tip Character Cakes Made Easy - January 20, 2023
Taya
Hi I'm Taya! A stay-at-home mother to 5 cuties. I love to craft, sew, blog and make fun things. I'm the creator of the 'Eat-Pray-Create' blog and I'm so glad you're here!


26 Comments
mamzelle CarnetO
such a good idea ! I keep it for my mum. She hates deco, cute things, but if I make it a little bit design ?
Mrs. Wilson
Oh my word! You are so craft!! I LOVE this! Can I pay you to make this for me??
Mrs. Wilson’s World
Whitney Song
How long would it take to do the birthday sign?
Taya
I would say a couple hours. You have to let the paint dry between coats and before applying the vinyl.
Patty
Where did you get the Family Birthday font from?
Taya
Patty, I can’t remember what the font is called, I no longer have it on my computer. I am trying to find it so I can let you all know. I’ll update when I figure it out!
Grace armendariz
Was just wondering where did you get the vinyl to the board????
Taya
Grace, I get the vinyl from Amazon (see link in post) and cut it with my Vinyl cutter. If you don’t have one you can buy pre-cut vinyl off of etsy.com!
Harriet Bina
Cute idea, but what is the vinyl for and where does it
go?
Taya
Hi Harriet, I added info to the post above answering your questions, hope it helps!
Juliana Pompêo
Hi Taya, I loved it… but I have no skills to do this.
I was wondering if you want to sell… Can I order one?
I’m from Brazil but in May I’m going to US.
thanks!
Juliana
Taya
Sorry Juliana I don’t make and sell these. But you can look on etsy.com where people make and sell them!
Kelly
What font did you use for the Family Birthday sign??
Taya
I don’t remember, and I no longer have the font on my computer, I will try to figure it out and get back to you!
Denise Bell
Hi, just wondered what you meant about cutting out the vinyl. Does it come in peel off sheets or do you actually have to cut each letter out. I’m clueless on how to do this. Thank you in advance.
Denise
Taya
Hi Denise, I added info to the post above answering your questions, hope it helps!
Lisa C
What system did you use to do the vinyl? What is the name of the font? I’m on spring break and need a project!
Taya
Hi Lisa, I added info to the post answering your questions, hope it helps!
lian
Hello!
Where did you buy the board?
Taya
It was leftover wood my husband had lying around. Probably from Home Depot or Lowes. You can ask them to cut it to the length you want.
lian
Last question, what did you use as a hanging hardware?
Taya
I think my father-in-law hung it using picture hanging hardware you find at the hardware store, the kind you nail into the back of the board and then hang on screws or nails that are on the wall.
Heather D
I wondering what is the size of the lettering you used for both the months and Family Birthdays.
Kelly | Typically Simple
Such a great gift to make for someone! Thanks for sharing at the Creative Inspiration party!
Julia @ Swirls and Spice
SUCH a great idea! Pinning!
Amanda
Cute idea. I love the way yours turned out! Thank you for sharing with us at Merry Monday!