-
Finishing Garage Stairs using Vinyl Flooring
Finishing Garage Stairs using Vinyl Flooring This is a simple and easy method for covering up plain wood stairs that are unfinished. It can easily be done in a day. This is great for those unfinished garage stairs that are such an eyesore! We love our finished Garage Stairs, and the inexpensive vinyl made it even better. Keep reading for a little tutorial on how to do it yourself! Look how well they turned out… Here are our Garage Stairs before, notice the slight gap on the left-hand side between the wall and stairs(we covered that up as well)… Wanna cover your unfinished Garage Stairs too? Here is what you’ll…
-
Under the Bed Rolling Lego Storage Drawers – A Tutorial
Our son LOVES Legos! But have you ever stepped on one of those suckers!?!? OUCH! After stepping on one too many Legos we decided we needed a better storage solution for them. Something that was easy to put away and something that he couldn’t just dump out all over the floor. That’s when my handy husband came up with these under the bed Lego Storage Drawers that easily roll in and out from under the bed and are very sturdy. You could also use them for other stuff like clothes, toys, etc. We wanted to show you how we made them so you can make them too! Enjoy the tutorial! (this…
-
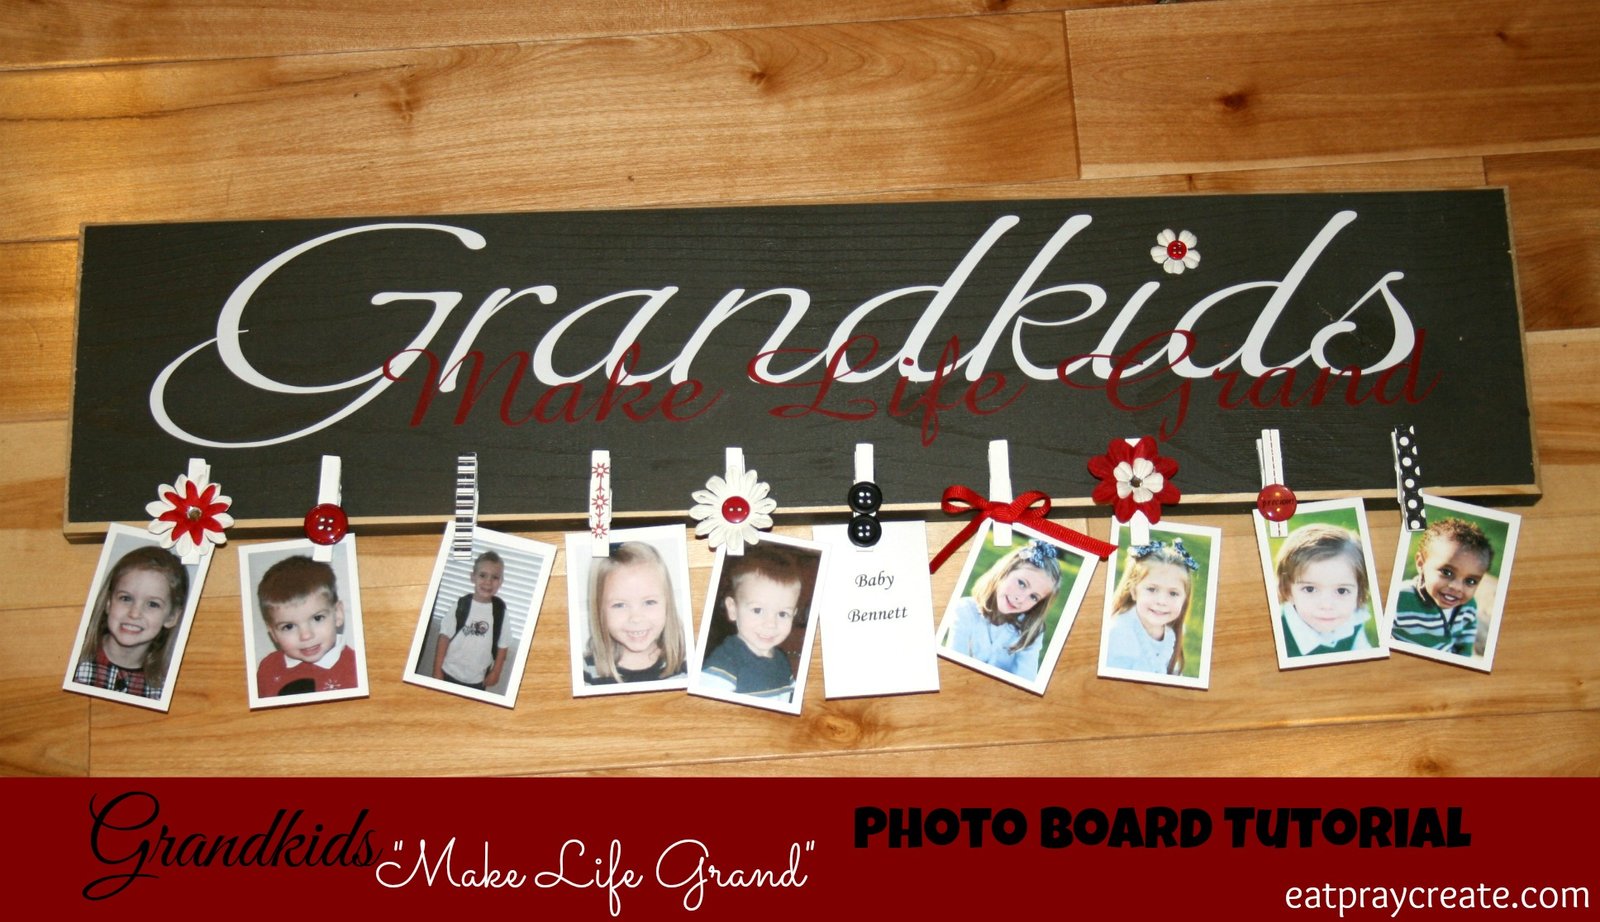
Grandkids Make Life Grand Picture Board Tutorial
Looking for a great gift for Grandma and Grandpa? Well look no further, I came up with this little Grandparent’s picture board several years ago and put it on my blog. It gets pinned like crazy! So I thought I would give you all a little step-by-step tutorial on how to make one, they are so easy and fun. The perfect personalized gift for Grandparents. (This post contains Affiliate Links) Supplies Needed: Wood Board – (mine is about 2 feet long) Paint/paint brush – (I used black for the board and white for the clothespins) Vinyl/Craft cutter – (I used white and red vinyl and my Silhouette Digital Craft Cutter- see note below…
-
Free Printable Chore Charts – Newsletter Sign-up
I am so excited to share my Free Printable Chore Charts with all my fabulous readers out there! If you haven’t already, all you have to do is sign-up for the ‘Eatpraycreate’ Newsletter and you will be able to download any (or all) of these adorable (customizable) Printable Chore Charts…. (Click HERE to view the Tutorial on how to add your child’s name to their chart) Click below to sign-up for our newsletter and download your free chore charts… Subscribe to EatPrayCreate by Email *Please Note: Your email will never be sold or shared with others, you will only receive updates from EatPrayCreate when a new post is up on…
-
How to add Child’s Name to Chore Chart
Once you have signed up for our Newsletter and downloaded your free Chore Charts you can customize them by adding your child’s name to the top. This is a step-by-step tutorial on how to do it, for free, right on your own computer! Lets get started… (Looking for your Free Printable Chore Charts?? You can find them HERE) First you will need to go to ‘PicMonkey‘ online. It is a free editing software program with everything you will need. Once there just click ‘edit’ and open the chore chart you would like to add a name to. (You will need to find where you saved it when you downloaded the…
-
How to Darken Curtains (the simple, easy method)
Need to darken your room or your kids rooms to help you sleep? Also know as ‘Blackout Curtains.’ Lining your curtains doesn’t have to be complicated! I know in the summer my kids have a hard time going to bed when it is still bright outside until really late. So here is a simple tutorial on how to darken your curtains quickly and easily, oh and its really cheap too… Supplies: Blackout Fabric (more details in the tutorial) Your Curtains Measuring Tape Scissors Thread (that matches your curtains) Sewing Machine Tutorial: First your going to measure the height of your window. You are going to want to add extra inches to the height so the blackout fabric goes several…
-
The Quick and Easy Method for Hanging Shirts
I am often surrounded by Laundry! Clean laundry, dirty laundry, piles and piles of laundry! So I love to find or come up with ideas that help make the chore quicker and easier. Today I want to share with you the quick way I hang shirts, it has helped me get laundry done more efficiently. Here are the simple, easy steps to hanging shirts in no time at all (yeah, more time to craft!!) *First lay all your shirts in a pile with necklines lined up at the top. Have your hangers sitting close by. *Next, starting from the BOTTOM, add your hangers one shirt at a time working your way to the top of the pile. (remember tuck…
-
Clean and Organize your Kitchen – Part 4
Welcome Back to the Clean and Tidy Series: How to Clean and Organize your Kitchen. If you missed it here is Part 1, Part 2, and Part 3 of our Kitchen Organization Series. Today I want to show you how cute the Food Storage Kitchen Canisters I made turned out!! I showed you how I made them in Part 3. They are so cute, and I love having my food in nice organized canisters. And they were so simple to make! *If you need the instructions from the bag for food that you need to cook, simply cut out the instructions from the bag/box that the food came from and attach them to the back using…
-
DIY Large Photo Collage
DIY Large Photo Collages (An inexpensive DIY Tutorial) I’m so excited to share the Large Photo Collage I made with you! We recently moved into a new home and in this new home of ours is a large wall that goes up the stairway. I wanted to do something with that huge space that was dramatic and eye catching. That’s when I remembered seeing a picture of these large photo booth style collages on Pinterest. I knew then that, that is what I wanted to do. So I searched for a tutorial and couldn’t really find what I was looking for, for a couple of reasons: 1. I wanted to make one…
-
Rain Gutter Bookshelves
This is the perfect solution for all your kids books! Rain Gutter Bookshelves! Yes these are made from the rain gutters you buy at any home improvement store. My kids books were always getting thrown around and unorganized so I had my hubby drill these rain gutters into the wall studs for the perfect bookshelf storage! Here is where I first saw these….she has a great tutorial!